Saturday, October 24, 2015

Making Silly Putty

Making silly putty was a perfect way to talk about counting!  My class helped me count and measure the ingredients.  I mixed the ingredients inside of a plastic storage bag.   Students had a marvelous time playing with the putty.  


Silly Putty Recipe

2 cups white glue
1 cup liquid starch

Mix ingredients together in plastic storage bag.

We will use this putty to practice sight words by carving them into the putty.  This will also be the perfect way to create our own mint when we study money.  Students will use bottle caps and play money in the silly putty.  The putty will be perfect to press shapes during our shape unit.


Sunday, October 18, 2015

More and Less-A Great Math Unit

My class has soaked up every moment of our More and Less unit.  I introduced this number line on my chalkboard.  I would place the red frame on a number and have the frog jump one or two more, and one or two less.  The students would tell me what the number was.  When frog jumps to more he jumps above the numbers.  He jumps below the numbers when he is going to one and two less.  (This is in preparation for teaching addition and subtraction.  I ask students to jump above the number line when adding, and below the number line when subtracting.)  We also have number covers to play guessing games with the number line.

We have several games that we use for guided practice.  Each table has several number lines that are shared by partners.  The partners have a small red frame and a bear that bounces to numbers that are one and two more and less.

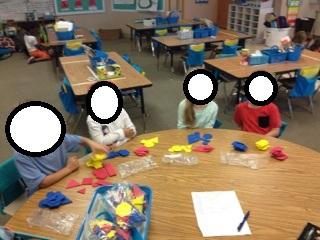
The students enjoyed several centers based on the more and less concept.
I had game boards that were labeled 1 More, 1 less, 2 More, and 2 Less.  Partners worked together using cubes to build towers on the corresponding boards.

Then, students worked to put number cards on a giant number line.  The teams took turns putting the red frame on a number and making the frog hop to one and two more and less.  Students were asked to identify the number that the frame highlighted, as well as the numbers that the frog hopped to.


Another center was a game using the number line on our chalkboard.  I placed three giant foam dice in the center.  Students were to roll the dice and count the total number of red dots.  Then, the team worked together to place the red frame around that number on the number line.  Students used the frog to hop to one and two more and less.


We created a class more and less project to demonstrate our understanding of the concept.  I folded a paper into four sections and labeled them 1 Less, 2 Less, 1 More, and 2 More.  We glued small collage squares into the sections.  (This project was great fun, but a challenge for our fine motor skills.)


Sunday, October 11, 2015

Sorting in Math Workshop-

My class loves to meet a character with each new Math topic.  This is sorting snake.  He whispers to me each time we need to change the sorting rule.  We learned to sort by type of object, color, shape, and size.
I taught the children sorting during our large group lessons.  Then, as part of independent practice, we sorted in collaborative groups.  I called it sorting in the basement.  Each team got under their table to sort using the sorting rule that sorting snake gave for that day.  On the last day, sorting snake asked the children to sort a group of objects in several ways.
This is type of object.
Sorting snake said to sort by color.
Type of Object.

Sorting snake said to sort by color.  Then, sort by shape.  Finally, by size.

Sorting snake said to sort by color.  Then, sort by size.
Students sorted by color, then by shape.  
We ended our unit by working in collaborative teams to sort by a particular rule.  Students used glue to create a project.


We shared our projects with everyone.
We have had a blast sorting in our centers.
We sorted shapes by color, shapes, and size.

We sorted old marker lids by color.
This group sorted by color.  Then, they sorted by shape.
This group sorted frogs by color and size.


Sunday, October 4, 2015

Science Centers-Living and Nonliving

Our class had several amazing discussions about the difference between living and nonliving things.  We looked at our Science chart and completed our workbook pages together.  Scientists must learn, discuss, and study a concept before moving toward application of the new found knowledge.  We tested our understanding in Science inquiry centers.  The students moved through four stations.  The first station was supervised, as we observed our fish, a plant, a rock, and worms.  The students were provided with clay to build a model of the worms.  Hand lenses helped us get an up close and personal look.  We decided that the worms, fish, and plant were living.  The rock is nonliving, even though Mrs. Meyer put eyes on it!
We weighed the worms on our balance.

A few creative scientists tried worm races.

Several of us used sticks to touch the worms!  We sent the worms home with a student to feed to his turtles.
Students sorted pictures into living and nonliving charts.
We looked at books from our Science basket.  Students discussed whether the books were about living or nonliving things.
Students collaborated as they worked on this living and nonliving paper.


Science Inquiry Centers-

Our class has been hard at work completing Science units on observing, including using our five senses, and how to use Science tools.  We completed our unit with inquiry centers using leaves.  These centers provided a wonderful opportunity to practice for our upcoming Math unit on sorting.
We used a balance to weigh leaves with cubes.
We experimented with measurement of different leaves.  The students had several tools at hand to use in measurement.  Some students used frogs and others used rulers.
Students used hand lenses to observe the leaves.  Colored pencils were provided so that the children could draw diagrams of the leaves.

We also observed an insect.